 Alright! Are we ready to step it up??
Did you review “First Things First!“??
Then let’s go!!
USE A CHAIR for SUPPORT!
RISE TO STAND!
 Now these workouts are to build strength in your legs. It will help you to get in and out of bed, in and out of a chair, stand and walk.
Now lets get that strong, stable chair (no wheels, no arm rests) and sit down, feet firmly on the floor. Put your feet a comfortable width apart, not together. Now, lean over just slightly, and looking straight ahead, ever so slowly, stand up. Try NOT to use your hands. If you need to, that’s ok, just as you do more and more, try to work towards doing it hands-free. And just sayin’, that can be on your chair or on your knees. With this in mind, when you are progressing from not using your hands, raise your hands out in front of you (hands open or in a fist, your choice.) Growl if you need to. Whatever makes it work for you!
Now, after you’re standing, stand for a few seconds, then slowly do the reverse and ease back onto your chair. The key is to do it slowly, building up the strength in your legs.
Now, let’s repeat that. Leaning over slightly, looking straight ahead, no hands, slowly rise up into a fully upright position. Stand for a few seconds, then slowly ease to sit back down again.
Repeat this about 5 times. Most of these exercises, we try to start with 5 repetitions. When you feel like you’ve mastered it well and want to do more, increase the number of times you do them. move up to 7 times, 10 times, goodness, even 20 if you’re feeling that good!!
Whew! Time for a little water break!
LET’S STRETCH!
 Woo!! Before we continue, let’s do a bit of a stretch! (And just sayin’… do NOT hold your hands in the air, that is, unless you are feeling frisky and know you are strong enough to do so!) Now, that being said, firmly hold the back of your chair, then, keeping your back straight, slowly lean way over to your right (you can feel this is your left side). Hold it a few seconds, then slowly straighten back up. Now, do the other side! Keeping your back straight, slowly lean over to your left (you can feel this on your right side). Hold it a few, then slowly straighten back up. Do this about 4 more times, each side. Then, I like to finish up by slowly leaning forward, keeping your back straight (and feeling it in your lower back). Then slowly straighten back up.
Next, you may think to lean backwards. Instead let’s just stand tall, pull your shoulders back and push out your chest!
Yea!! That feels better, doesn’t it!! I feel loosened up (and relieved. lol)
NOW, let’s move on…
SQUATS!
 These exercises not only help to build the strength in your thighs, but your calves, as well! They will help strengthen your legs to squat or kneel. Which is handy when you dropped something, you don’t have to go get a pair of tongs to pick it back up. 😉
Ok, that chair we were using previously, we are going to turn it around so we are standing behind it.
Now, place your hands on the back of the chair, a comfortable width apart. Now, spread your feet shoulder width apart. Keep your toes pointing straight ahead. Keep your back straight and look straight ahead.
Now, holding that chair for support, slowly lower yourself to ‘squat’, keeping your back straight as possible. Squat down as low as you can go, but don’t go so low to lose your balance. Then slowly rise back up again until you are standing fully upright. Now, push your shoulders back a bit for a little stretch. 🙂
Awesome! Now, let’s try to do it 5 more times! Remember, back straight, look straight ahead, and go slowly.
 Alright! Now, we’re going to take that last exercise and add an extension to it!
Now, stand behind your sturdy chair again! Place your hands on the back of the chair, your legs about shoulder width apart, toes pointing forward, as you did before.
Now, slowly bend your knees, keeping your back straight… hold that pose for about 10 seconds. Then slowly straighten your legs back out, breathing normally.
Here comes the extension… Still holding onto your chair for balance, rise up onto your tippy-toes! Keep your legs straight! Feel the extra pull in your calves? Hold that pose for a few seconds, then lower yourself back down, flat footed.
That’s great!! You just gave your workout an extra boost!
Let’s see if we can do that 4 more times! Starting from the beginning!!
These exercises are great for the calves and thighs!! And the extension gives the feet a bonus workout for strength, stimulation and getting limber!!
Fantastic! Go ahead and have a water break!
Now, let’s try to loosen up those legs a little bit!
TO THE SIDE LEG LIFTS!
 Standing as you were before, (behind the chair and hands on the back of the chair for support), but this time, stand with your feet comfortably together.
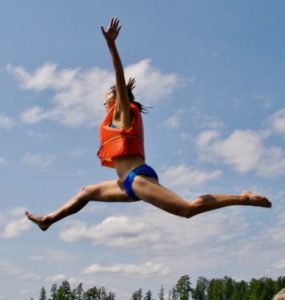
Now, keeping your back straight and looking straight ahead, slowly lift your right leg straight out (keeping it straight) to the side, lifting it as high as you comfortable can. Remember, Just lift your leg straight out and try NOT to lean to the side. (Don’t do like the girl in the picture, she’s doing it all wrong. lol) Now, slowly lower your leg back to it’s original position.
Next, repeat with your left leg. Remember, look straight ahead, your back straight and strive not to lean. And slowly lift as high as comfortable, then slowly lower back. Repeat 5 times for each leg.
Whew, while we’re still here, lets go ahead to the next exercise…
REVERSE LEG STRETCH!
 Standing in position behind the chair, hands on the back of the chair for support and feet together. Keep your back straight, looking straight ahead. Remember that this is a LEG exercise, NOT your back. So, as you are doing these workouts, do NOT arch your back. Your legs and back will thank you. 😉
Ok… in position! Starting with your right leg, keeping your leg straight, slowly raise it backwards behind you. If you start to feel a little warming sensation in the back of your thigh and your buttocks, you’re doing it right! when you went as far as you feel that you can, hold that position for 5 seconds, then slowly lower your leg/foot back in it’s original position.
Now, repeat with your left leg. Remember, keep your leg straight, go slowly, when you get there, hold for 5 seconds, then slowly return.
Now, Go through the repetitions 5 times with each leg!
Nice!! Alright, now a quickie to shake it all off, standing with your hands on the back of the chair and feet together, just at the knee, bend your right leg. Go slow, go quick, you choose. Then do the other leg. Do it a few times.
Whew!! Alright!! GREAT JOB!! You’ve had quite the workout!! Time for a water break!! 
USE THE WALL for SUPPORT!
Marching!
 Alright, let’s do this!
Stand facing the wall and stretch your arms out and put your hands on the wall for support. Have your feet a comfortable distance apart.
Now, slowly lift your right knee as if marching. When you get your knee straight out, hold for a few seconds then slowly lower until you are in a standing position again.
Now, repeat with your left knee. Awesome!! Now, do each leg 4 more times if you can!
Remember! NEVER over-exert yourself! Do ONLY what you feel comfortable with. Remember, any exercising is better than none, so just do what you can! You’ve got this!! 🙂
Steppin’!
Again, facing the wall, feet a comfortable distance apart (about shoulder width), hands on the wall about the same distance apart. Now, step forward with your right foot (’til your toes are at the wall) and kinda lean your hips forward until your knee touches the wall. Try to keep your back leg straight as possible. Breathe normally. Hold that pose for 10 seconds, if you can. Then ease back up into your original position.
Now, repeat with your left leg. Again, stepping forward ’til your toes are at the wall and leaning your hips to the wall until your knee touches. Remember to keep your back leg straight as possible and hold for 10 seconds. (Don’t forget to breathe normally.) Then ease back to original position.
Try to repeat this a couple of more times!
Nice job!! 🙂
Upright Pushups!
 Standing facing the wall, a comfortable arm’s length away, back straight. Now, stretch your arms out and place your hands flat on the wall. Situate your feet a comfortable width apart.
Now, slowly bend at your elbows until your face and chest comes close to the wall. Hold a moment, then slowly straighten your arms back out until you are fully upright again. Congratulations, you did your first upright pushup!
Now, let’s see if we can do that 9 more times, for a total of 10! If you can’t, that’s ok, try for 5? Maybe next time you’ll get more! The thing is that you are doing them! Anything is better than nothing! 🙂
Lets go get that water!!
 Ok, now, with your right side to the wall, place your right hand and elbow on the wall and your feet at a comfortable distance. Now, cross your left leg over your right leg, placing your left foot on the floor and bring your hip slightly towards the wall. Try to hold that for about 10 seconds. (You can slightly bounce your hip if it makes it easier and more comfortable for you.) Now, go back to your original position.
And now turn so your left side is to the wall, placing your left hand and elbow on the wall and your feet at a comfortable distance. Cross your right leg over your left leg, placing your foot on the floor like before, and bring your hip slightly towards the wall again and try to hold about 10 seconds. And now go back to your original position.
Nice!! Good work!! 🙂
REMEMBER, YOU ARE THE ONE IN CHARGE!
If you haven’t already, be sure to check out the exercises to do while sitting!
Always remember, YOU are the one in charge. You are in control of when you workout and how much you do and how long you do it! The choice is always yours! While I never want to see you over-exert yourself, I would like to see you push yourself just a little bit harder than last time, try 2 more repetitions than the last time, maybe try a new exercise with your routine this time. But most of all, I want to see you feel better about yourself, feel stronger, feel healthier and be happier!! No matter what I want, remember, it’s YOU in charge!! 🙂
A great concept showing people they can use aids to help them exercise and still get the benefit of it. It is a very easy to follow routine with step by step instructions that the reader can easily tune in with. Nice work
Thank you! I do all of these myself, regularly. 🙂
Hi Patty,
This is great exercises for standing, with only the wall and chair(cheap)and now the trick for me is consistency.Thanks for this great information and only 5 to start is easy.The wall pushups are more my speed as well, I am not good at the other pushups.
Thank you, I do hope you find them to help! 🙂